PoRn0
Guild home Guild list Guild Forum Stories & RPG FAQ
How to create Dark Horse andDark
Raven
SM, Bk, ELF, MG,
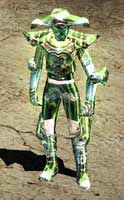
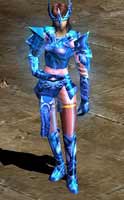
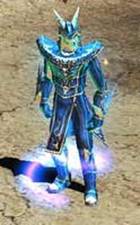
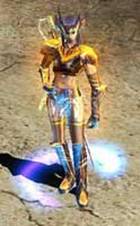
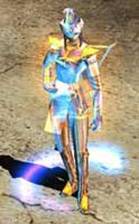
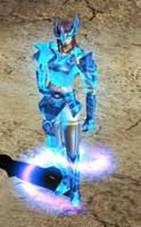
DL and summoner Sets
How to create Chaos Item and 1st, 2nd
and 3rd level WINGs and Cape of Lord
How to upgrade your set to +13
i cant wear my set, but I have the necessary points
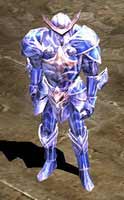
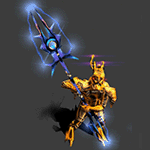
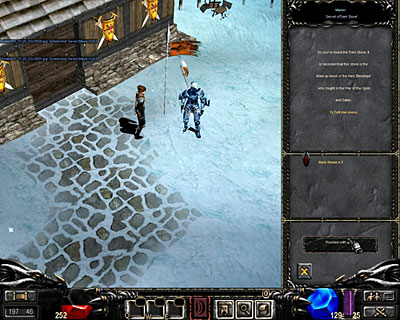
Kundun Boss
Kundun Boss е
чудовище
което пуска
по-новите
оръжия:
Viper Staff, Mace Of The King, Blade Of Fire, Shining Scepter, Universal
Shield,
Grand Soul Shield, Archangel Crossbow
Също така от
него падат и
Древните
айтъми(Ancient Items).
В някои
сървъри може
да се намери
в Kalima 7
като се ражда
през
определени
часове в зависимост
от сървъра
В други
сървъри се
появява на
15-тата минута в
Devil Square 5 & 6.
![]()
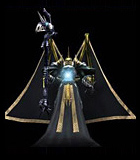
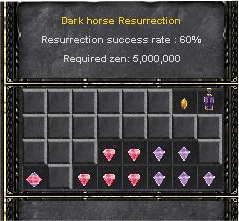
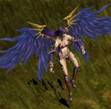
How to create Dark
Horse andDark Raven
Къде
се правят:
При - Trainer – обикновенно може да се намери в Lorencia от ляво на Бара
Как
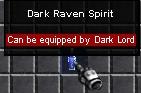
се прави Dark Raven
(Гарга както
я наричате)..
Нещата, които
са Ви нужни
са:
* 2 Jewels of Bless
* 2 Jewels of Soul
* 1 Jewel of Creation
* 1 Jewel of Chaos
* 1 Spirit of Dark Raven
Когато ги
намерите
нужните
предмети
отивате в Lorencia
при Trainer и
слагате
нужните
предмети..
Снимка
1 - Предмета Spirit of Dark
Raven
Снимка
2 - Всички
предмети
заедно

--------------------------------------------------
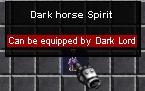
Как
се прави Dark Horse
За него са ви
необходими:
* 5 Jewels of Bless
* 5 Jewels of Soul
* 1 Jewel of Creation
* 1 Jewel of Chaos
* 1 Spirit of Dark Horse
И тук е
същото -
когато ги
намерите
отивате при Trainer
в Lorencia и
нареждате
необходимите
неща..
Снимка 1 -
Предмета Spirit of Dark Horse
Снимка
2 - Всички предмети
заедно
How to create screen
shot
Скрийн
шот (снимка)
се прави
много лесно.
Използва се
за спомен и
за
доказетелство
често.
Като влезете
в играта,
натиснете на
клавиатурата
си бутона "Print Sceen"
на лаптопи се
натискат два
бутона, "fn"+"prt
screen".
След като
снимате, може
да намерите
снимката в
папката на
играта, и в
втората
папка image.
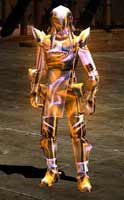
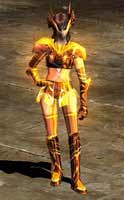
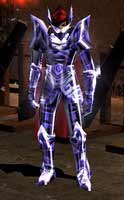
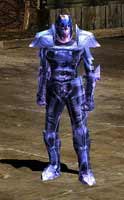
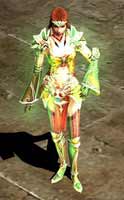
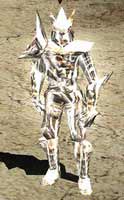
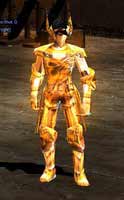
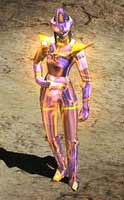
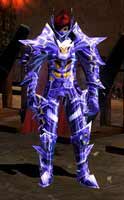
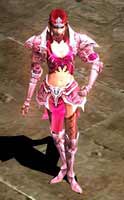
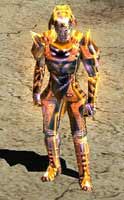
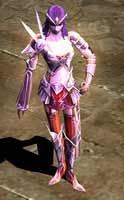
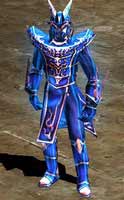
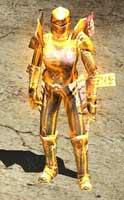
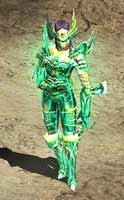
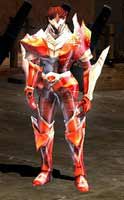
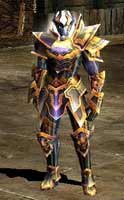
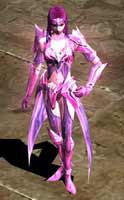
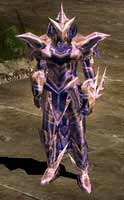
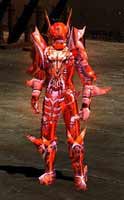
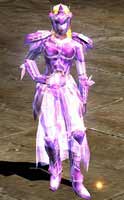
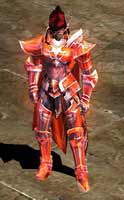
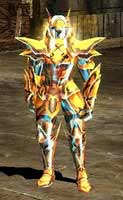
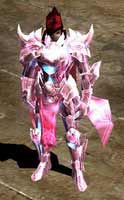
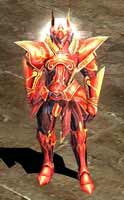
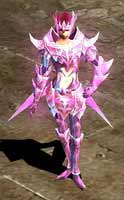
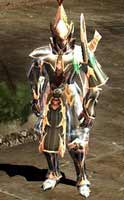
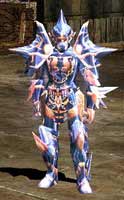
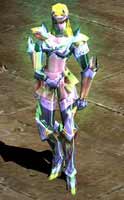
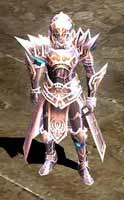
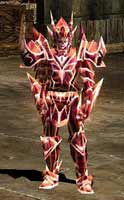
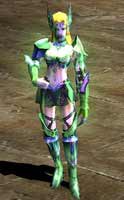
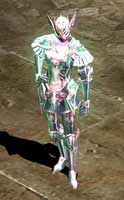
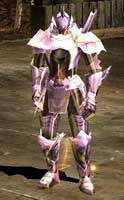
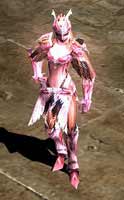
SM, Bk, ELF, MG, DL and summoner Sets
|
SM Sets |
BK Sets |
Elf Sets |
MG Sets |
DL Sets |
Summoner Sets |
|
Pad Set
|
Leather Set
|
Vine Set
|
Storm Crow Set
|
Light Plate Set
|
Mistery Set
|
|
Bone Set
|
Bronze Set
|
Silk Set
|
Thunder Hawk Set
|
Adamantine Set
|
Red Wind Set
|
|
Sphinx Set
|
Scale Set
|
Wind Set
|
Hurricane Set
|
Dark Steel Set
|
Ancient Set
|
|
Legendary Set
|
Brass Set
|
Spirit Set
|
Volcano Set
|
Dark Master Set
|
Black Rose Set
|
|
Grand Soul Set
|
Plate Set
|
Guardian Set
|
Valiant Set
|
Glorious Set
|
Aura Set
|
|
Dark Soul Set
|
Dragon Set
|
Divine Set
|
Phantom Set
|
Sunlight Set
|
Lilium Set
|
|
Venom Myst Set
|
Black Dragon Set
|
Red Spirit Set
|
Destroyer Set
|
King Set
|
Queen Set
|
|
Eclipse
|
Dark
|
Sylphid Ray Set
|
|
|
|
|
Hades Set
|
Great Dragon Set
|
Iris Set
|
|
|
|
|
|
Dragon Knight Set
|
Faith Set
|
|
|
|
|
|
Ashcrow Set
|
Seraphim Set
|
|
|
|
|
|
Titan Set
|
|
|
|
|
|
|
Brave Set
|
|
|
|
|


Golden Invasion
Кое
чудовище и
каде да
убиеш, че да
си вземеш Box of Kundum?
|
Box of Kundum+1 |
Box of Kundum+2 |
Box of Kundum+3 |
Box of Kundum+4 |
Box of Kundum+5 |
|
Golden Goblin |
Golden Titan |
Golden Dragon |
Golden Lizard Kings |
Golden Tantallos |
|
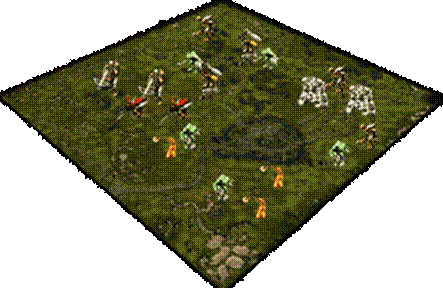
Lorencia и Noria |
Devias |
Lorencia, Noria и Devias |
Atlans 2 и 3 |
Tarkan 1 и 2 |
|
|
|
|
|
|

Agility Bug
MU Online Agility Bug
Dark Wizard
Evil Spirits
* 25 - 5700 > работи
нормално
* 5700 - 6550 > работи с
Dino/Unicorn
* 6550 - 8200 > работи
нормално
* 8200 - 9820 > работи с
Dino/Unicorn
* 9820 - 10700 > изобщо не
работи
* 10700 - 13250 > работи с
Dino/Unicorn
* 13250 - 15700 > работи с
Dino/Unicorn
* 15700 - 23250 > изобщо не
работи
* 23250 - 28250 > работи
нормално
* 28250 - 32767 > работи с
Dino/Unicorn
Inferno
* 25 - 32767 > работи
нормално
Nova
(Това е добра
магия ако Evil Spirit-а
не ви работи.)
* 9820 - 10700 > работи
* 32767 > работи
Dark Knight
Twisting Slash
* 25 - 32767> работи
нормално
Fiery Elf
Triple Shot
* 25 - 23200 > работи
нормално
* 23200 - 25250 > изобщо не
работи
* 25250 - 32767> работи
нормално
Magic Gladdiator
Evil Spirit
* 25 - 11200 > работи
нормално
* 11200 - 12880 > работи с
Dino/Unicorn
* 12880 - 16200 > работи
нормално
* 16200 - 19440 > работи с
Dino/Unicorn
* 19440 - 21200 > изобщо не
работи
* 21200 - 26200 > работи
нормално
* 26200 - 31100 > работи с
Dino/Unicorn
* 31150+ > изобщо не
работи
Twisting Slash
* 25 - 32767 > работи
нормално
Inferno
* 25 - 32767 > работи
нормално
Dark Lord
Firescream
* 25 - 2400 > работи
нормално
* 2400 - 5000 > работи с
horse/uni/dino
* 5000 - 5600 > изобщо не
работи
* 5600 - 6800 > работи
само с horse/dino
* 6800 - 8000 > работи с
horse/uni/dino
* 8000 - 11800 > изобщо не
работи
* 11800 - 16600 > работи с
horse/uni/dino
* 16600 - 32767 > изобщо не работи
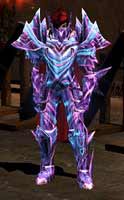
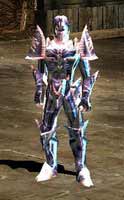
Ancient Items
|
New Ancient Sets |
|||||||||||||||||||
|
|
||||||||||||||||||
|
|
||||||||||||||||||
|
|
||||||||||||||||||
Regular Ancient Sets
|
|
||||||||||||||||||
|
|
||||||||||||||||||
|
|
|||||||||||||||||||
|
|
|||||||||||||||||||
|
|
||||||||||||||||||
|
|
||||||||||||||||||
|
|
|||||||||||||||||||
|
|
||||||||||||||||||
|
|
||||||||||||||||||


DMG Colors
Normal DMG -
Нормален DMG
Critical DMG -
Получава се
от buff на Dark Lord и от Luck
(Critical DMG rate) опция на
предмет
максималния
DMG който
можете да
направите
Direct DMG -
Директен DMG
върху
(кръвта)
живота в PVP
Curse DMG -
Само при Summoner от
опция Curse Spell
Ignor DMG -
Игнорира
даден % DMG от
опонента Ви и
го връща към
него
Exelent DMG -
Получава се
от опцията - Exelent DMG
rate 10%
SD Brake DMG - DMG-а
който
нанасяте
върху
защитата на
опонента
Reflect DMG -
Препратен DMG
получава се
от опция Reflect DMG + 5 %
Poison DMG
-Получава се
когато сте
отровен
Castle Siege
Изисквания
:
Всичко, което
участващите
съюзи трябва
да имат е Guild Master,
който да е
поне левел 200
или по-висок
(няма никакви
ограничения
в класа на
героя).
Поне 20 члена
или повече.
За да бъде
възможно
участвието
ви в Евента Castle Siege
или поне за
да спечелите
Евента
,вашият Guild (съюз)
трябва да бъде
част Guild Alliance.
Всеки в
картата Valley Of Loren
може да
участва , но
тези членове
и клубове
немогат да
спечелят събитието.
Необходими
са поне 2 Guild Alliance-a за
да има битка.
Ако съюза (Guilda) ,
които държи
крепостта е
разпуснат
когато и да е
те ще изгубят
крепостта!
Там могат да
бъдат само
три нападащи
клуба по
време на
събитието.
Как да се
регистрирате
за обсада :
Няколко
съюза (Guilds)
трябва да
говорят с Guardsman NPC и
да натиснат
бутона "Announce" и
тяхната
регистрация
ще бъде приета.
Само Guild Master-a на
основния
съюз (Guild) на Alliance-a
може да обяви
намерение за
обсада като
говори с Guardsman NPC.
Всички
членове на
съюз (Guild) , които
са обявили намерението
си, че ще
участват в
обсадата, могат
да съберат и
предадат Sing of Lord
през периода
на
регистрацията.
Когато в Guardsman NPC е
вписано ,
името на
клуба и съюзническите
сили на
клубовете
"класации" те
ще излязат на
регистратурата.
Когато Guardsman NPC е
щракнато на
информацията
за статус
информацията
ще бъде
показана.
Клубовете са
наредени
съгласувайки
няколко
фактора,
включително
това колко Sign of Lord
са били
придобити.
Само първите
3 съюза (Guilds) и
техните
съюзници ще
бъдат с
предимство
за обсадата.
Пресмятане
за
регистрация
"ранг" :
Регистрация
"класация" =
((много
регистрирани
Signs of Lord * 5) + (Брой на
членовете на
клуба) +
Нивото на Guild Master-a.
Същност на
битката за
обсадата :
Когато
клубната
регистрация
е завършена, нахлуващият
екип и
неговите
съюзници ще имат
икона на меч
а
защитаващия
екип и неговите
съюзници ще
имат икона на
щит.
Наказанието
за PK няма да
бъде
приложено на нахлуващия
екип и
защитния но
ще бъде приложено
срещу други
герои, които
не са участници.
Клубът на
победителят
ще има
"Коронясване
Марк " на
върховото
вместо това
от сабята или
щит Марк.
Неутрални
герой няма да
бъдат
маркирани като
нападатели
или
защитници.
Регистрация
от клуб /
Оттеглянето
по време на
борбата не е
дадено.
Обсадете
играчите
Нахлуващият
екип ще
получи сабя
Иконата и защитата
ще имат щит
на връх на
техния герои.
Съюзът на
победителят
ще има нова
икона, тя ще е
синя корона
за защитата и
червена за нахлуващия
екип.
Разгръщане:
Основна
политика и
печелившо
условие:
Нападането
на вашите
собствени
съюзници е
възможно с
натискане на
клавиша "Ctrl" .
За да
спечелите
обсадата в Castle Siege,
официалният
подпис на
победителя
от съюза
трябва да
бъде регистриран
в пиедестала,
който се
намира, в The Dragon Tower, и
ако то е било
успешно
регистрирано,
лордът на
крепостта е
обновен с
играча,който
се e
регистрирал.
Само Guild Master-a на
съюза може да
регистрира
официалния
подпис за
пиедестала.
За да го
регистрирате,
натиснете в
продължение
на 30 секунди И
ако 2 смяни,
които са
необходими
за трополене,
са анулирани
или героят е
убит,
регистрацията
ще се
провали.
Ако има
оставащо
време, равно
ако регистрацията
е успешна,
борбата ще
продължи
освен 2
лагера на
нахлуващите /
Защита ще
бъде разменена.
Alliance-a с техния
официален
подпис са
регистрирани
и при краят
на обсадата
ще станат
лордовете на
крепостта.
Съюзът, който
има
крепостта
(включвайки
alliance-a), може да се
телепортира
във Valley Of Loren,
където ще се
отива в
Крепостта.
Пиедестал в
превключвател
* командата
за изкривяване
не може да
бъде
използвана
през етапа на
войната на
обсада в Castle Siege, но
защитата
може да се
изкриви в
предната част
на замъка
като
използва"портал
на градче
"свитък".
White wizard invasion
|
Победете White Wizar-а и негожите Орки |
|
От време на време White Wizard и неговите Орки атакуват. Който победи инвазията може да получи специален пръстен "Wizard's Ring", който овеличава силата със 10% и скоростта със 10. |
|
|
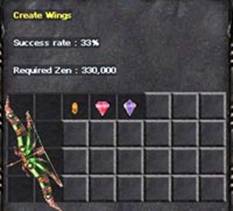
How to create Chaos Item and 1st, 2nd and 3rd level WINGs
and Cape of Lord
Creating Chaos Item
|
За да направите chaos item трябва да сложите в Machine 1 Jewel of Chaos + Items вдигнат до +4 (или повече) със option +4 (или повече). Колкото по висок е предмета, който слагате в машината толкова по-голям е шанса за успех. Успешна комбинация създава Chaos Dragon Axe, Chaos Nature Bow или Chaos Lightning Staff. Jewels of Bless, Jewels of Soul, Unicorns, imps, angels и повече итеми +4+4 или по високи вдигат % на успех също. Максимален % шанс в масхината е 100% |
|
Забележка:
* Ако
комбинацията
се провали
Вашите итеми
ще им се
свали новото
а chaos-a ще
изчезне.
Creating Level 1 Wings
|
Следващата стъпка е да вдигнете Chaos Item to +4 със +4 option (или повече) и да го сложите в машината с друг Jewel of Chaos. Отново може да вдигнете вашият итем за да повишите % на успех. След успешна комбинация ще получите 1ниво Криле. Забележете, че можете да направите криле на случаен принцип независещ от вида на Chaos предмета. Jewels of Bless, Jewels of Soul, Unicorns, imps, angels и повече итеми +4+4 или по високи вдигат % на успех също. Максимален % шанс в масхината е 100% |
|
Забележка:
* Ако
комбинацията
се провали
Вашите итеми
ще им се
свали новото
а chaos-a ще
изчезне.
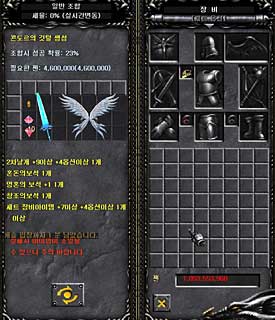
Creating Level 2 Wings and Cape of Lord
|
За да направите 2 ниво Криле ( или Cape of Lord) вдигнете вашите криле +4 със +4 option (или повече) и ги сложете в Chaos the machine съседин Jewel of Chaos и 1 Loch's Feather (Chrest of Monarch за Cape of Lord). Този път за да вдигнете % на успех няма да може да ползвате нормални предмети. Вместо тях ще Ви трябват Excellent вдигнати предмети +4+4( или повече). При успешна комбинация ще получите 2 ниво криле. Забележете, че можете да направите криле на случаен принцип независещ от вида на 1ниво Криле. Максимален % шанс в масхината е 90% |
|
Забележка: * Ако комбинацията се провали Вашите предмети ше изчезнат!

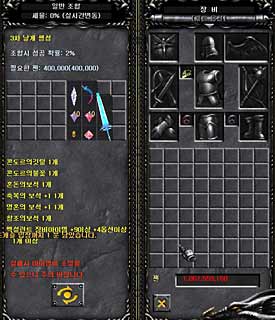
Creating Level 3 Wings and Mantle of Lord
За да
направите
3ниво Криле
или ( Mantle of Lord) Вие
трябва да
направите Feather of
Condor.
|
Creating a Condor Feather |
|
|
За да
направите Condor Feather трябва
да направите
chaos комбинация
при Chaos Goblin-а. Сложете
2ро ниво Криле+9+опция,
1 Jewel Of Creation, 1 Jewel of Chaos, 1пакет
от 10 Jewels of Soul и 1 Ancient
Предмет+7+опция.
Шанса за
успех е 60% и ако
комбинацията
се провали
ще загубите всичко.
При успех ще
получите Feather of Condor.
|
|
|
Creating your new Wings |
|
|
Последна
стъпка за да
направите 3то
ниво Криле. Сложете
Вашият Feather of Condor в Chaos
Machine със Excellent
Предмет+9+опция,
1 Jewel of Chaos, 1 Jewel of Creation, 1 пакет
от 10 Jewels of Bless, 1 пакет
от 10 Jewels of Soul и Flame of Condor (което
пада в Barracks) |
|
|
Герой |
BK |
SM |
Elf |
MG |
DL |
Summoner |
|
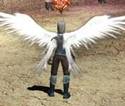
Криле
1во ниво |
Satan
Wings
|
Heaven
Wings
|
Fairy
Wings
|
Може да
ползва: SM криле
1во ниво BK криле
1во ниво |
Няма |
Mistery
Wings
|
|
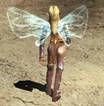
Криле
2ро ниво |
Dragon
Wings
|
Archangel
Wings
|
Spirit
Wings
|
Darkness
Wings
|
Cape
of Lord
|
Despair
Wings
|
|
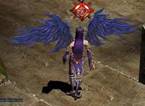
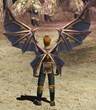
Криле 3то ниво |
Storm
Wings
|
Vortex
Wings
|
Illusion
Wings
|
Doom
Wings
|
Mantle
of Lord
|
Violent
Wind Wings
|
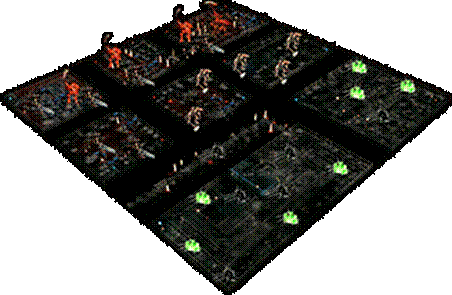
Locations
|
Lorencia |
|||
|
Lorencia is a wide plain located in the center of MU. Dark knights and Dark Sorcerers begin their careers here. Due to heavy rainfall tall trees and grasses abound. It is a suitable hunting place for low level (1-20) adventurers. |
|||
|
|
|||
|
Level Limit |
Dark Knights and Dark Wizards were born in this place. If a fairy elf wants to go to Lorencia, she needs to be over level 10. |
||
|
Features |
This is the place that Dark Knights and Dark Wizards start an adventure. |
||
|
Monsters |
Spider, Budge Dragon, Lich, Bull Fighter, Giant, Hound,
Elite Bull Fighter, Skeleton Warrior. |
||
Noria |
|||
|
Noria, the home world of the Fairy kingdom, is a huge woods located in the easternmost of the MU Continent. Originally, Noria was once populated only by the Fairies, but after Kundun's invasion of MU, exchange between humans grew more frequent and human settlement in the region became more pronounced. Fairy characters all begin their careers within Noria. The region's location may seem trivial but as the access point for the East Sea and the underwater city of Atlans it plays a significant role. The Chaos Goblin that creates Chaos items and Wings through the unique Chaos System also resides here. |
|||
|
|
|||
|
Level Limit |
The land of Fairies. Dark Knights and Dark Wizards should be at least level 10 to move freely within Noria. |
||
|
Features |
The start point for Fairy characters. The Chaos Goblin is located in this place. |
||
|
Monsters |
Chain Scorpion, Goblin, Stone Golem, Agon, Forest Monster, Elite Goblin, Hunter, Beetle Monster. |
||
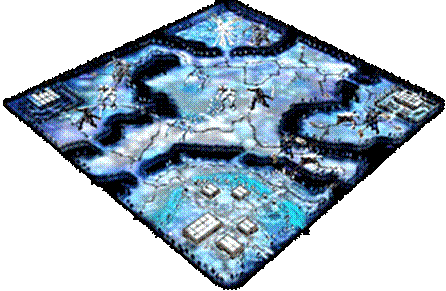
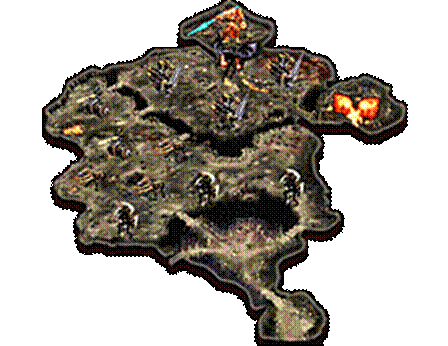
Devias |
|||
|
Devias is a snowfield located at the north of Lorencia and it covered with perpetual snow. Monsters here are more powerful than those in Lorencia or Noria so only adventurers over leve 15 can enter Devias. The guild master who creates and manages guilds is also located in Devias." should be changed to "Devias is a snowfield located at the north of Lorencia and it is covered with perpetual snow. Monsters here are more powerful than those in Lorencia or Noria so only adventurers over level 15 can enter Devias. The guild master who creates and manages guilds is also located in Devias. |
|||
|
|
|||
|
Level Limit |
A minimum level of 15 is required to enter. |
||
|
Features |
A snowfield where strong monsters reside. The Guild master who manages guilds is located here. |
||
|
Monsters |
Yeti, Elite Yeti, Ice Queen, Assassin, Ice Monster, Worm, Hommerd. |
||
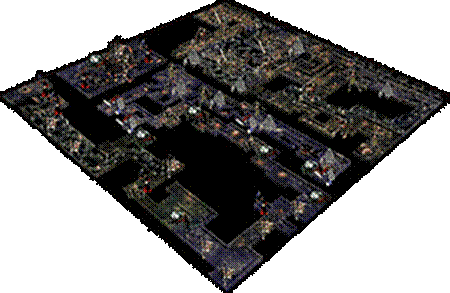
Dungeon |
|||
|
The Dungeon is a formidable cave located to the north of Lorencia. With a total 3 levels, The Dungeon is home to the Gorgon, a frightening beast that lays in wait on the lowest level. Many a brave adventurers has entered the Dungeon but few have returned to tell of their tale. Due to the lure of untold treasures within these caverns, but beware, Hell is but a stones throw away from the horrors that reside here." should be changed to "The Dungeon is a formidable cave located to the northeast of Lorencia. With a total of 3 levels, the Dungeon is home to the Gorgon, a frightening beast that lays in wait on the lowest level. Due to the lure of untold treasures within these caverns, many a brave adventurers have entered the Dungeon but few have returned to tell of their tale. If you are brave then venture forth but beware, Hell is but a stones throw away from the horrors that reside there. |
|||
|
|
|||
|
Level Limit |
A minimum level of 20 for the first floor, 40 for the second floor and 50 for the third floor are the requirements for movement. |
||
|
Features |
Complicated three-story cave. Strong monsters live here. |
||
|
Monsters |
Ghost, Dark Knight, Cyclops, Larva, Skeleton Archer, Elite Skeleton Warrior , Skeleton Warrior, Thunder Lich, Hell Spider, Hell Hound, Poison Bull, Gorgon. |
||
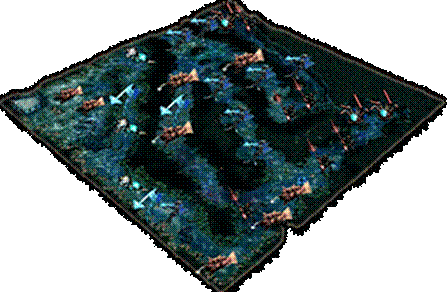
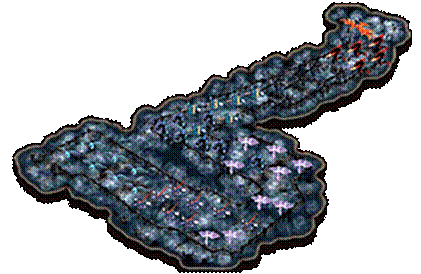
Atlans |
|||
|
The once beautiful Ocean of Atlans, became inhabited by one of Kundun's Strongest Monsters, the Hydra. The Hydra then summoned several sea monsters to guard the pathway to Tarkan. Atlans is on the southern part of Noria and is not for the weak. The Treasures of Atlans is guarded by the Hydra for a reason. |
|||
|
|
|||
|
Level Limit |
Character level 60 and above may walk to Atlans but must be 70 and above to warp there. Characters with level 5 Gloves and above may utilize a faster swimming speed as they race through Atlans. |
||
|
Features |
Strong adventurers may challenge the Hydra and his army of sea monsters. Though not all will survive, those who do are astounding. |
||
|
Monsters |
Bahamut, Vepar, Valkyrie, Great Bahamut, Silver Valkyrie, Lizard King and Hydra. |
||
Lost Tower |
|||
|
The Lost Tower is a huge tower located to the north of the MU continent. The Lost Tower had once been used as a shrine, but after the plunder of Kundun, it has become an utter wasteland. Kundun has assigned various forms of dreadful monsters to each floor of this tower. Balrog, a foul beast located on the top floor that flourishes a scythe waiting for its prey. There are few warriors in the land of MU who can compete with him. in the land of MU who can compete with him. |
|||
|
|
|||
|
Level Limit |
Characters level 80 and above may move to the Lost Tower but must be level 90 and above to warp there. A level over 80 is required for the second floor, 90 for the third floor, 90 for the fourth floor, 100 for the 5th floor, 100 for the 6th floor and 110 for the 7th floor. |
||
|
Features |
Highest degree of difficulty, best items and treasures, prime hunting spot for exceptionally strong adventurers. Levels 90 can warp to Lost Tower. |
||
|
Monsters |
Devil, Death Cow, Death Gorgon, Shadow, Poison Shadow, Balrog, Cursed Wizard, Death Knight. |
||
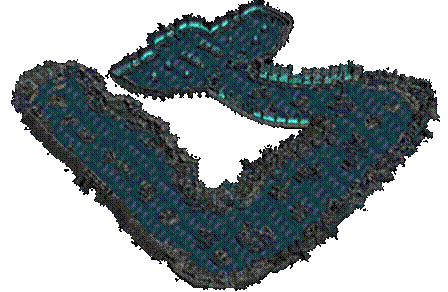
Tarkan |
|||
|
The Desert of MU, Tarkan holds host to some of the strongest monsters. Only few stray to Tarkan to seek the treasures guarded by the Zaikan and the Death Beam Knight. The remains of many warriors who dared travel to Tarkan can still be seen lying in the desert. |
|||
|
|
|||
|
Level Limit |
Characters of level 130 and above may reach the desert of Tarkan. Characters with level 140 and above may warp directly to the deserts of Tarkan. |
||
|
Features |
Tarkan holds many great treasures gaurded by Zaikan and the Death Beam Knight. |
||
|
Monsters |
Mutant, Bloody Wolf, Iron Wheel, Tantalos, Beam Knight, Zaikan, Death Beam Knight. |
||
|
Icarus |
|||
|
The path in the sky, Icarus is one of the toughest maps and only the highest levels can survive there. Either wings or a flying mount is required to enter this map. Guarded by the Dark Phoenix, only the strongest teams stand a chance of reaching the end. |
|||
|
|
|||
|
Level Limit |
Characters of level 170 can warp while riding a flying mount or with wings, or walk in at 160 with a flying mount. |
||
|
Features |
Great treasures await those who are able to defeat the guardians of the sky. |
||
|
Monsters |
Alquamos, Mega Crust, Queen Ranier, Drakan, Alpha Crust, phantom Knight, Great Drakan, Phoenix of Darkness. |
||
|
Kalima |
|||
|
The world that Lord Kundun has been banished to houses his most loyal minions. Not just anyone can enter Kalima champions of MU must first find the Lost Map which can be made from finding 5 pieces of the Lords Mark. There are 6 gateways to Kalima and Champions are only allowed to enter the levels in which they are allotted. Only in Kalima 6 will Champions find the true Lord Kundun himself. |
|||
|
|
|||
|
Level Limit |
Kalima is broken into 6 levels of entry based on your characters level. But anyone above level 15 may enter their respected Kalima. |
||
|
Features |
Kalima houses items not yet seen to the Continent of MU; also in Kalima 6 Lord Kundun himself awaits your arrival. |
||
|
Monsters |
Aegis, Lord Centurion, Blood Soldier, Death Angel, Necron, Death Centurion, Schriker, Illusion of Kundun. |
||
Quest
1 and 2
|
QUEST 1 |
|
|
|
Когато
достигнете
ниво 150, отидете
до Priestess Sebina в Devias за да
чуете
историята
за 'Scroll of Emperor'. Ще
трябва да
предложите 1
Million Zen за
историята
на Priestess. |
|
Като
почувствахте
силата на
свитъка да
тече във Вас, the
Priestess започва
история за
господството
на Императора
Muren's. Blade Knight, Soul Master, или Muse Elf. |
|
QUEST 2 |
|
|
|
Легендарното
съкровище
наричано 'Ring of Glory', веднъж
носено от
първият
Император Muren се
появило още
веднъж по
нашите земи. |
|
The Blade Knights притежават
сила която
само те
могат да владеят.
Това умение
събира
техниките
които те умеят
заедно и ги
прави
безкрайно
силни като никои
няма да може
да им устои. |

Quest 3
|
Превръщането в 3ти клас герой изисква да е завършена задачата на Marlon и новата задача има 3 части. |
|
|
Част 1 |
|
|
|
Условия
и награди: Задачата
Започва и
Свършва: NPC Priest Devin (Намира
се в: Devias 182,27 /оригинално
мястоe/), Разговор
с нея. |
|
Част 2 |
|
|
|
Условия
и награди: Задачата
Започва и
Свършва : NPC Priest Devin, Разговор
с нея. |
|
Barracks of Ballgass напътствие
по картата: Място
за Влизане: NPC
Werewolf Quarrel (Локация: Devias
187,27), След
разговора
натиснете
бутона за
потвърждение
за да
влезете в
картата (Водача
на Партито
трябва да
влезне пръв). |
|
|
Част 3 |
|
|
|
Условия
и награди: Задачата
Започва и
Свършва: NPC Priest Devin, Разговор
с нея. Награда
за
приключване:
Допъллнителни
20 точки, както
и
превръщане
в 3ти клас
Герой.
|
|
Ето и
Новите
Класове,
които ще
придобиете
след
приключване
на задачите: |
|

How
to upgrade your set to +13
За да си
вдигнете
предмета на +10
ви трябва:1 Jewel of Chaos,1
Jewel of Bless,1 Jewel of Soul
За да си
вдигнете
предмета на +11 ви
трябва:1 Jewel of Chaos,2 Jewel of Bless,2
Jewel of Soul
За да си
вдигнете
предмета на +12
ви трябва:1 Jewel of Chaos,3
Jewel of Bless,3 Jewel of Soul
За да си
вдигнете
предмета на +13
ви трябва:1 Jewel of Chaos,4
Jewel of Bless,4 Jewel of Soul
Ако предмета има опция LUCK ви се вдига % на успех в чаос машината
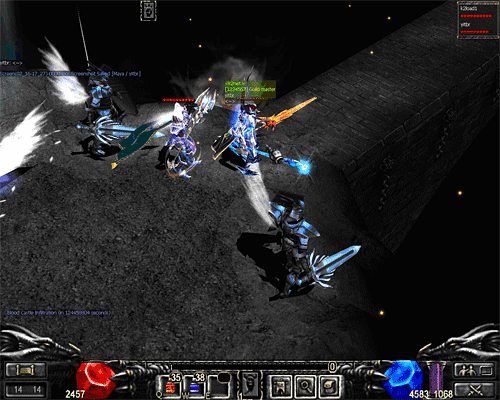
Blood Castle
|
Рискувай живота си за да спасиш Архангела |
|
|
Един от
най-силните
бойци на
Континента MU е the Archangel; наскоро
е бил
повален. Архангелът се е наранил и е в смъртна ; призови боици от континента на MU, да доидат и да помогнат на Архангела в този тежук момент. В
невъзможност
да призове
силите си
зеб своят Divine Weapon of
Archangel, Вие сте
помолени да
го намерите
в замъка и да
му го
върнете. |
|
|
|
|
|
Предмет |
Предметът
се пуска от
животно
ниво; |
|
Scroll of Archangel +1 |
Над LV. 2 (Spider) |
|
Scroll of Archangel +2 |
Над LV. 32 (Ghost) |
|
Scroll of Archangel +3 |
Над LV. 45 (Vepar) |
|
Scroll of Archangel +4 |
Над LV. 57 (Death Cow) |
|
Scroll of Archangel +5 |
Над LV. 68 (Silver Valkyrie) |
|
Scroll of Archangel +6 |
Над LV. 76 (Blood Wolf) |
|
Scroll of Archangel +7 |
Над LV. 84 (Beam Knight) |
|
Blood Castle е разделен в зависимост от вашето ниво: |
|
|
Ниво на Blood Castle |
Ниво на героя (-20 LVL заMG и DL) |
|
1 |
15-80 |
|
2 |
81-130 |
|
3 |
131-180 |
|
4 |
181-230 |
|
5 |
231-280 |
|
6 |
281-330 |
|
7 |
331-400 |
|
Blood Castle Правила |
|
|
- Команда WARP работи
в Blood Castle - Убийствата не са възможни в Blood Castle. |
|
|
Награди |
|
|
- Героите
които
оцелеят до
края ще
получват като
награда
един Jewel of Chaos ( за
частните
сървъри
наградатаможе
да се промени) |
|
|
|
|
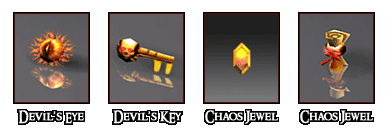
Devil
square
|
Достатъчно ли си силен за да оцелееш? |
|
|
Влезте
като един от
общо 10 играча
за да предизжикате
силите на Kundun когато
те се раждат
пред вас в
неспир. Сами
или в парти най-силните
ще оцелеят
във Devils Square. Със
покана за Devils Invitation, ви
се дава
достъп за Devils Square, където
вашата сила
ще бъде
тествана. |
|
|
|
|
|
Предмет |
Предмета се пуска от животно от ниво: |
|
Devil's Eye +1 |
Над LV.3(Goblin) |
|
Devil's Eye +2 |
Над LV.36(Elite Yeti) |
|
Devil's Eye +3 |
Над LV.47(Shadow) |
|
Devil's Eye +4 |
Над LV.60(Devil) |
|
Devil's Eye +5 |
Над LV.70(Lizard King) |
|
Devil's Eye +6 |
Над LV.80(Iron Wheel) |
|
Devil Square е разделен според нива на героите: |
|
|
Ниво на Devil Square |
Ниво за да влезете (-20 LVL за MG и DL) |
|
1 |
15-130 |
|
2 |
131-180 |
|
3 |
181-230 |
|
4 |
231-280 |
|
5 |
281-330 |
|
6 |
331-400 |
|
Devil Square Правила |
|
|
- warp може да
бъде
ползвана
след като
влезете в Devil Square. |
|
|
Награди |
|
|
- Участниците
могат да
запазят
итемите които
са паднали
повреме на
битката в Devil Square. |
|
|
|
|
Emotions
Emotions:
Това са
команди за
различни
пози на вашия
герой. Пишат
се с /
отпред,(може
и без "/") и
задължително
трябва да
започват с
главна буква
/^^ или /Haha - Смях
/; или /Sorry – Чеше се
по главата
/Huhu – Скръства
ръце
/Bye - Сбогуване
/Cold или /Hurts – Трие
рамене
/Come – Махва на
някой
/Sad T_T или /Cry – Хваща
се за главата
/Hi - Приветства
/Good или /Nice или /Wow –
Пляскане с
ръце
/OK – Повдига
рамо
/Respect - Коленичи
/Sir – Поздравява
/Hustle - Прави
смешно
движение
/Win
/Rush
/Gogo
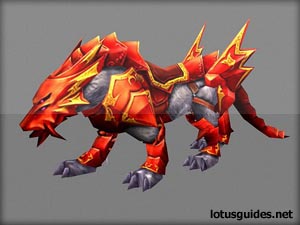
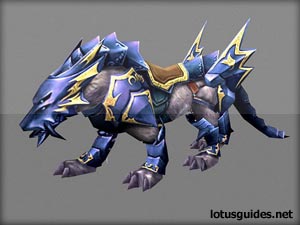
Fenrir
Ниво 300 или по
голямо Blade Knight, Soul Master, Muse Elf,
Magic Gladiator, Dark Lord и Bloody Summoner могат
да ползват Fenrir.

Fenrir-а е
ожесточен
митологичен (Кон)
създание
приличащо на
гигантски
вълк.
В MU Online fenrir-ът
е добажка към
всички класи
герои като овеличава
скоростта на
предвижване
и няколко
много добри
предимства.
Fenrir-ът има общо 255 HP и може да бъде нараняван. За да излекувате Fenrir сложете Jewel of Bless върху него.
Атаката на Fenrir е със Плазма Дъжд, която е единствена по рода си (Mana 50, AG 20).
Red Fenrir
Стъпка 1
20 части
от Splinter of Armor
20 части от Bless of
Guardian
1 Jewel of Chaos
Тази комбинация ще произведе 1бр. Piece Horn (70% вероятност за успех)
Стъпка 2
5 броя
от Horn
10 броя от Claw of Beast
1 Jewel of Chaos
Тази комбинация ще произведе 1бр. Broken of Horn (50% вероятност за успех)
Стъпка 3
1 Broken Horn
3 Jewels of Life
1 Jewel of Chaos
10M Zen
Тази комбиначия ще произведе Red Fenrir (30% вероятност за успех)
Подобряване
на Red Fenrir-a
1 Horn of Fenrir
5 Jewels of Life
1 Jewel of Chaos
Един или
повече Level 4 (минимум),
Option 4 (минимум) Оръжие
за да
създадете Destruction
Fenrir
Един или
повече Level 4 (минимум),
Option 4 (минимум) Дреха
за да
създадете Destruction
Fenrir
Комбинацията ще произведе един от следните:
Black Fenrir:
Horn of Fenrir + Destruction (овеличава
удара)
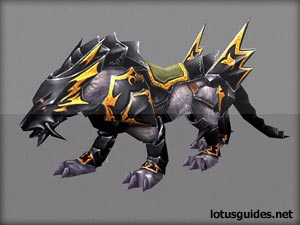
Blue Fenrir:
Horn of Fenrir + Protection (абсорбира от удара)
Забележка:
* Помнете, че
повреме на обновяване
на Fenrir в Chaos Machine има
шанс да бъде
загубен
завинаги.
Golden Fenrir
Всички
играчи които
победят Castle Siege и
използват Fenrir ще
трансформират
Fenrir-а си в Golden Fenrir който
епо-силен.
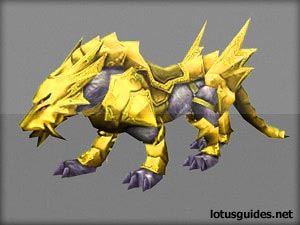
Забележка*:
В голяма част
от частните
сървъри
единственият
начин да
получите Golden Fenrir е да ви
го даде Админ
или ГМ като
награда.
i
cant wear my set, but I have the necessary points
Понякога
изписаните
точки на
итема не са верни,
и играча се
нуждае от
повече Strength,Agility
или Energy (най-вече
Strength)
With the “THE GOD” ,”Lord”, “KR373N” and Nightmare help
Created by MassacrE